The difference that drives the estimate: what the fastener lands in
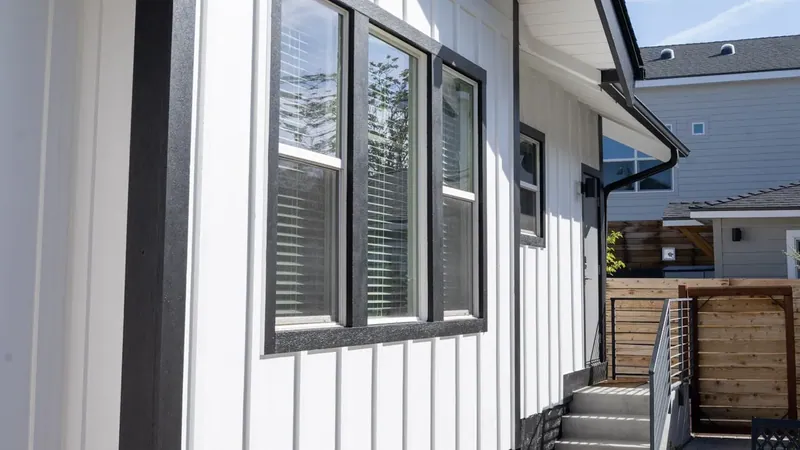
Lap siding runs across the studs. Every course crosses framing at regular spacing, so a nail driven at the layout mark finds solid wood whatever the sheathing is. Vertical siding runs the way the studs run: parallel to them, and mostly through the empty bay between them, where a fastener has nothing but sheathing to bite.
That one piece of geometry produces every other line on a board-and-batten quote: the furring, the deeper trim, the layout time, the higher waste factor. It is not a style surcharge. It is a framing problem you solve before the first board goes up.
Furring: the line item a cheap vertical quote leaves out
The usual fix is horizontal furring: strips fastened through the sheathing into every stud, over the weather-resistive barrier, at the spacing the published instructions call for. The panels are then fastened to the furring rather than to the wall. Three things follow, and all three cost money.
- The wall gets thicker. Everything that dies into the wall face moves out with it: window and door trim, jamb extensions, corners, the soffit return (where the underside of the roof overhang meets the wall), hose bibbs, dryer vents, exterior boxes. On a retrofit those parts take the hours.
- The drainage plane takes more fasteners, which is a reason to detail the barrier fully before the strips go on, and never after.
- You gain a drainage gap, and in freeze-thaw country that is a genuine upside. Furring turns the assembly into a vented rainscreen: water behind the cladding has somewhere to run, and air behind the panel dries the back face.
The alternative is a panel whose own instructions permit direct vertical application over a specified sheathing. Those products exist. What does not exist is a site decision that the studs are close enough together.
Panel layout and seam strategy
Lap
Lap layout is a levelling problem. The starter strip sets the first course and every course after it repeats whatever error is in that line: a sixteenth out at the corner is a visible wander by the time you reach the frieze. Butt joints get staggered so no two land in the same bay on consecutive courses, each lands on framing, and the manufacturer's joint treatment goes in behind it: flashing on fiber cement and engineered wood, a factory joiner or a lapped end on vinyl.
Vertical and board and batten
Vertical layout is a dividing problem, done on paper before anything is cut. Panel and batten spacing has to divide the elevation evenly, land on furring, and reconcile with the openings. A batten running into the edge of a window casing reads as a mistake even when the spacing is technically right. We set a reference near the middle of the wall and work outward so both ends finish the same width.
Battens have one rule that gets broken constantly: a batten is fastened so it does not pin two boards together. Drive the fastener through both and the wall is locked rigid across a joint that has to move, and the boards split the first time the temperature swings thirty-odd degrees between afternoon and dawn. Vertical vinyl expresses the same principle differently: the nail goes in the centre of the slot and stays loose enough that the panel can slide.
Where the install hours actually go
| Item | Lap | Vertical |
|---|---|---|
| Nailing base | Existing framing, straight to the wall | Horizontal furring, or a panel cleared for direct application |
| Layout | Level the starter, stagger the butt joints | Divide the elevation, reconcile battens with the openings |
| Seams | Horizontal butt joints, flashed and staggered | Vertical joints, every one on framing or furring |
| Trim depth | Unchanged | Moves out by the furring thickness at every opening |
| Waste | Offcuts reusable across the elevation | Cut to wall height, offcuts often stranded |
| Where it fails | The butt joint nobody flashed | The seam that missed the furring |
Waste belongs in that list too: lap offcuts move to the next opening, while vertical panels are cut to wall height and the remainder is usually stranded (worse on gables). Averaged across a house the material cost of the two sits closer together than most people expect. The labour does not. A quote showing vertical and lap at the same number has either priced furring into the lap side or left it out of the vertical one.
Mixing the two on one house
Board and batten on a gable over lap on the field walls works, and the transition is a detail rather than a colour change: a horizontal band with a sloped top and a drip edge, flashed and lapped over the course below. Butting the two materials and running a bead of sealant across the joint is the version that leaks in year three.
If you are choosing a profile for your own house, the siding profiles and materials we install are laid out on our siding page.